
Chic and Simple: Crafting Your Own Beaded Chain Bracelet

Creating a beaded chain bracelet is a delightful project that combines the elegance of jewelry with the satisfaction of DIY crafting. In this blog post, we’ll explore how to make your own beaded chain bracelet, perfect for adding a touch of handmade charm to your accessory collection or for gifting to someone special.
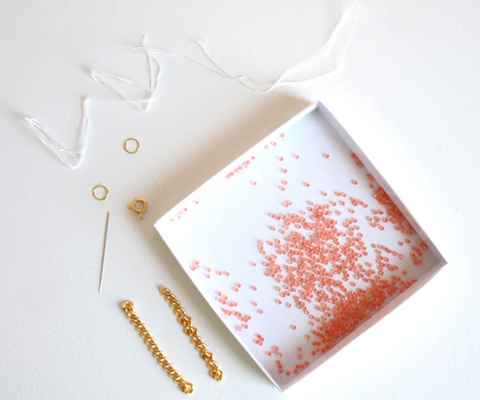
Materials Needed:
- Upholstery thread or two strands of embroidery floss
- Seed beads (sizes 10/0 and 11/0 recommended) or Motif
- A needle small enough to pass through the beads
- Scissors
- Clasp and jump rings
Step-by-Step Guide:
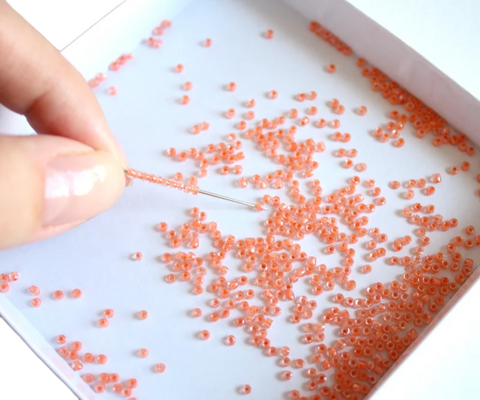
Step 1: Planning Your Design Decide on the length of your bracelet and the pattern of your beads. This might involve some sketching or laying out your beads in the desired sequence.
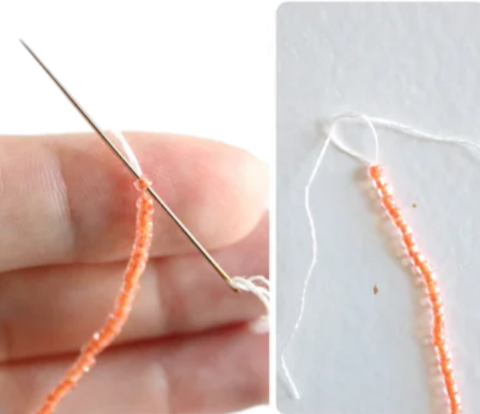
Step 2: Threading the Needle Cut a length of upholstery thread or embroidery floss, and thread your needle. Tie a knot at the end to prevent the beads from slipping off.

Step 3: Beading Start stringing your beads according to your design. Keep the tension even but not too tight, as this will be the decorative part of your bracelet.
Step 4: Securing the Beads Once you’ve finished beading, secure the end by tying a knot. Make sure it’s tight enough to hold the beads in place but still allows some flexibility.
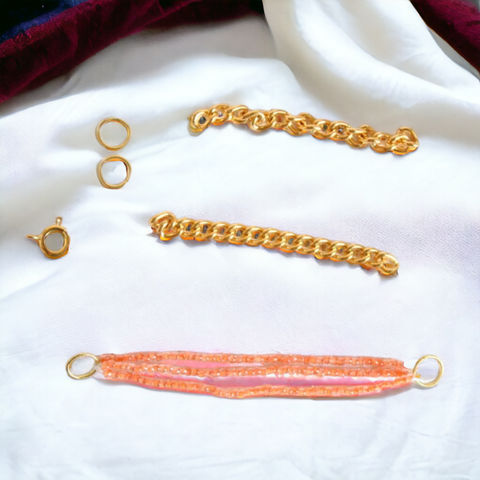
Step 5: Assembling the Bracelet Attach the clasp and jump rings to the ends of your beaded chain. Ensure they’re securely fastened to prevent the bracelet from coming undone.

Finishing Touches: After assembling, give your bracelet a gentle test to make sure everything is secure. Adjust if necessary, and then your beaded chain bracelet is ready to wear!
Tips for Success:
- Choose colors that complement each other and consider the occasion for which you’re making the bracelet.
- Be patient, especially if you’re new to beading. It takes practice to get the tension just right.
- Experiment with different bead sizes and shapes for a unique look.
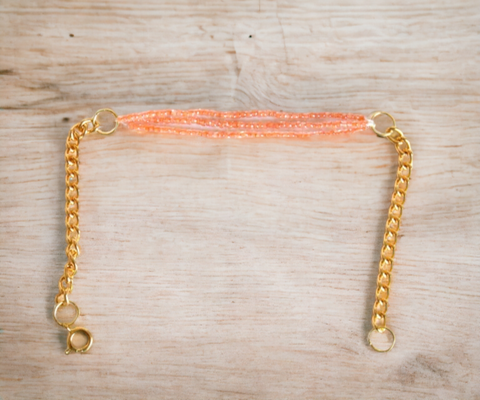
Beaded chain bracelets are a versatile and stylish addition to any jewelry collection. With a little time and creativity, you can create a beautiful piece that reflects your personal style. Whether you’re dressing up for a special occasion or adding a splash of color to your everyday outfit, a beaded chain bracelet is the perfect accessory.


1 reactie
✨✨✨✨✨✨✨✨✨✨✨✨✨✨✨✨✨✨✨✨✨✨✨✨✨✨✨✨✨✨✨✨✨✨✨✨✨✨✨✨✨✨✨✨✨✨✨✨✨✨✨✨✨✨✨✨✨✨✨✨